Wednesday, December 19, 2012

Proportions

I used a layer mask to put the dog in the bowl.

Hands

 Layer-New Adjustment Layer-Color Balance-Adjusting the colors to the given color settings.
(Same steps for cool, warm, and emerald.)
 For gradient I used the series of steps as follows:
-Layer
-New adjustment layer
-Gradient map


Friday, December 14, 2012

David Hockney Polaroid

This picture was made into a David Hockney inspired collage picture with a series of steps.
I ended up having 20+ groups.

Tuesday, December 11, 2012

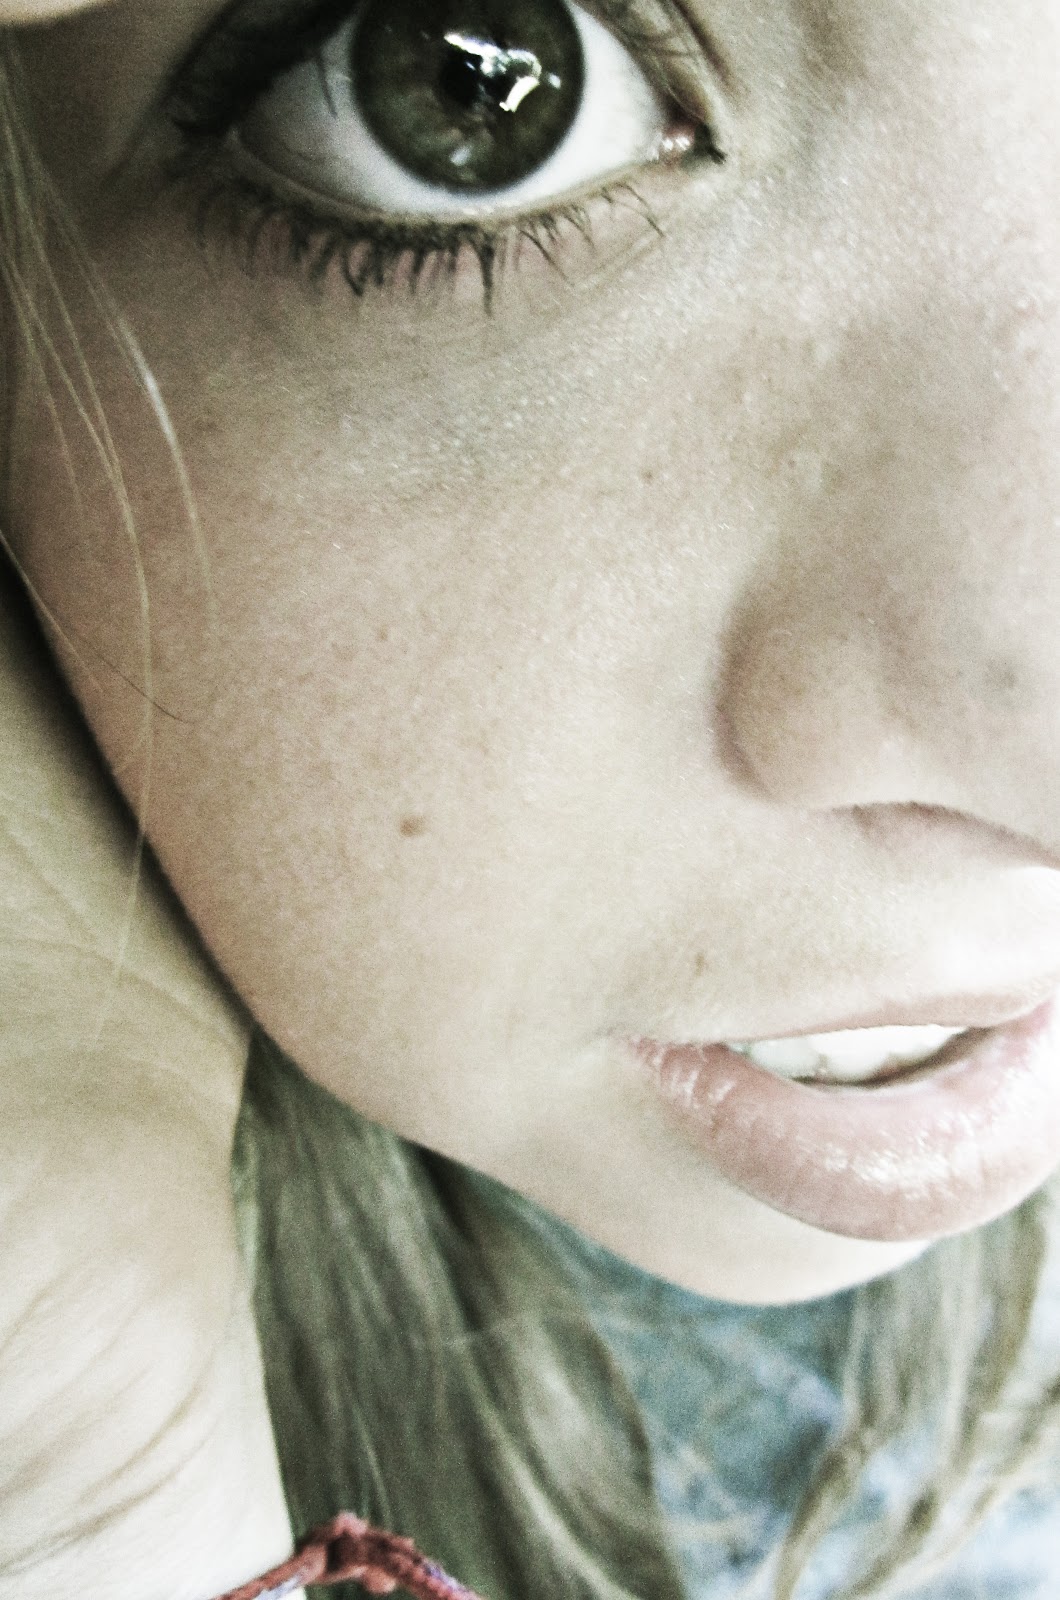
Skin, Teeth, and Vivid Eyes

 I softened her skin using the patch tool and dragging a section with a blemish to a smooth area of her face.
 I whitened these teeth by changing the colors of the image then coloring in where I wanted the white to be enhanced.
I whitened her teeth, cleared her skin, and made her eye color more vivid.

Tuesday, December 4, 2012

Lights

Same series of steps.


omg spiderman

Lights

Same series of steps.

Lights

In order to complete this project I had to follow a series of steps.
-I started with just an S shape
-duplicated the layer multiple times
-merged the layers and kept duplicating until I had a full circle
-added the glow affect
-changed the colors
Voilà.

Friday, November 30, 2012

Portrait to Custom Shape

In order to complete this project I followed a serious of steps.
-Resize image
-Select shadows on color range
-Make work path from selection
-Convert work path to solid fill
-Save color as a custom shape
-Open new plain document with white background, resize image
-Save image
 

Wednesday, November 28, 2012

Ink Sketch

In order to complete this project I had to apply the photocopy filter, the sharpen more filter, changed it to overlay, and then changing the hue/saturation.

Cinema Scope Portrait

In order to complete this project I changed the picture to cinema scope. To do this I had to duplicate the layer, then I adjusted the curves and made a color fill (yellow.)

Monday, November 19, 2012

Reflections

In order to complete this project, I took an image and dragged it to the left side of the picture. Then I used guide lines to show how much of the picture I wanted to reflect. I used the marquee tool and selected the part I wanted reflected on the other side of the image. Next, I copied the selected part.
Voila!!!!!! :*

Friday, November 16, 2012

Michelle Cohen Inspired Collage

This is my collage, inspired from Michelle Cohen's collage. I picked her collage because I liked that her collage was really modern, but she used cool faces with old fashioned looking glasses that seemed old fashioned.

Monday, November 12, 2012

Color Corrected

In order to color correct this picture I used the color correcting eye dropper tool and place the first pin on the darkest place, the second pin on the lightest place, and the third on a grey area. This changed the color a little and made the picture look better. 

Friday, November 9, 2012

Carter's Mountain Edits

Color adjustments. For this picture I just adjusted lighting, hue, and brightness.
 Black and white with a tint. I used the black and white tool then checked the box that said "tint".
 I used the text tool to make an advertisement.
 I used the black and white tool and then colored in the apple by using a layer mask.
I used the brightness tool to adjust the color of the image. 

Wednesday, November 7, 2012

Dafont


In order to complete this project I installed fonts that looked like a certain image, I then saved an image that worked with the font. (example: I saved a picture of a fairy and then saved a magical font).

Friday, November 2, 2012

Typography-Cat

In order to complete this project, I used the text tool and made a new layer for every letter. For the cat's head I put two U's together, L's for whiskers, V's for ears, an O for the body, an S for the tail, O's for the feet, and random letters for the inside of the body. 

Monday, October 15, 2012

Macro Images

 In order to edit and sharpen these images, I followed a series of simple steps:

  • Duplicate layer (Ctrl+j)
  • Rename Copy of background layer as "Sharp"
  • Change normal to overlay
  • Filter>Other>High
  • Sharpen


Thursday, October 11, 2012

Visual Pun- Deviled Eggs

In order to complete this project I used the Quick Selection tool and the Refine Edge tool.

Visual Pun- Book Worm

I used the tools Quick Selection and Refine Edge for this picture. 

Visual Pun- Frostbite

In order to complete this project, I decided on the pun "frost bite" then used 2 pictures (a boy eating cereal and pieces of frostbite) and used these tools to put them together: Quick Selection, Refine Edge, Layer Mask, and the Text Tools. 

Tuesday, October 9, 2012

Camera RAW

 White Balance: For this edit, I selected the part of the picture that was white with the white balance tool and it made the image slightly whiter/lighter.


 Blacks and Recovery Sliders: For this edit, I used the "Blacks" and "Recovery" sliders to make the image as dark as needed.
 Clarity: For this edit, I slid up and down from clear to blurry to make the image as defined as needed.
 Exposure and Fill Light: For this edit, I just slid the lever on the Exposure and Fill Light bars to make the picture lighter.
Vignette: For this edit, I went to the vignette selection and slid in to make it more shadowed, then slid out to make it lighter and not shadowed.
 2nd Exposure and Fill Light: I repeated steps for the first Exposure and Fill Light.

Friday, October 5, 2012

Jumping Off the Page

In order to complete this project, I followed a few steps. I started with the layers: 
  • Background
  • White box over background
  • Picture 
  • Background (landscape)
First, I used the paint bucket to fill in the background light pink. After that, I quick selected the girl blowing bubbles and pasted her onto the white box. Next, I made a new layer with the landscape background and put that layer behind the girl. After that, I put a drop shadow on both the girl and the background landscape picture by double clicking the layer and adjusting the shadow however I wanted it. At the end, I clicked edit, transform, perspective, and pulled the box corners the way I wanted in order to make the image look like it was popping out of the background. 

Tuesday, October 2, 2012

Kaleidoscope Painting

In order to complete this project, I started by using a paint bucket to fill the new 5x5 document with the color of my choice (light blue), then I used various brushes to create lines, stars, dots, and patterns all over my painting. When I was done I used the same kaleidoscope steps to make my painting into a kaleidoscope. After that I changed the hue and saturation of my picture. 

Monday, October 1, 2012

Kaleidoscope

 In order to complete this project I started by cropping the original image to 5x5. After that I copied the image and turned it horizontal... then placed it exactly next to the other. Next, I used the rectangular marquee to select half of it and deleted one side. Then, I created a new document (14x14 with 300 resolution) I merged all the layers and dragged it over to the new document. After that I duplicated the layer four times, flipped each horizontal and put them into a square.
To change the color I double clicked adjustments and changed the hue and saturation.


Wednesday, September 26, 2012

Tools Review

For this project I had to use the tools: Elliptical Marquee, Quick Selection, Polygonal Lasso, Magic Wand, Refine Edge, Layer Mask, Resized Imaged and Changed Resolution.
First, I changed the image size and resolution: Image-Image Size-Width to 8 and height to 10-then I clicked ok.

I used the elliptical marquee tool to select the eye from a picture of my cousin. I used the polygonal lasso tool to cut the eyelid part off from the eye and I then refined the edge. \

After that I used the quick selection tool to select my friend Gwen's silver ring. I used the keys ctrl c and ctrl v to copy and paste to the background picture.

Next, I used the magic wand tool to select the solid teal nail polish and paste it to my background image.

The last thing I did was click on the hot dog layer (which I copied and pasted after quick selecting) and click the layer mask tool. Then I selected the paintbrush tool and used it to make the illusion that part of the hot dog was under the plate.


Tuesday, September 25, 2012

Pop Art 2x2 with Dots


In order to do this one, I followed all the same steps as the one before, except I used the picture WITH the Ben-Day dots. 

Pop Art 2x2

In order to complete this I took the finished Pop Art picture, dragged it to a new 10x10 300 resolution Photoshop page, used the keys Ctrl +J to copy it four times. Next, I arranged the four into a 2x2 and used the crop tool to erase the remaining white spots.